DNA sampling season is getting into full swing
Many clients have started DNA sampling this years lambs. It is a good time to re visit DNA testing protocols and point out some of the issues you might have in an attempt to maximise your efficiency and accuracy when taking the samples.
4 things we find really important to get accurate DNA samples if you are collecting them at lamb marking are:-
Put your eID tags in the lambs in tag number order.
Use your TSU in TSU number order (refer to Step 8).
Make sure your TSU applicator is in good working order – we have had some TSUs turn up to the lab that are damaged from the sampling process and can not be processed easily (requiring manual handling).
Once the sample is taken, take the applicator away from the ear and repress the plunger to ensure the red stopper has sealed the sample in the TSU and the buffer liquid does not leak out.
Below are some steps you can take to ensure that your DNA sampling goes well.
Taking the DNA Sample
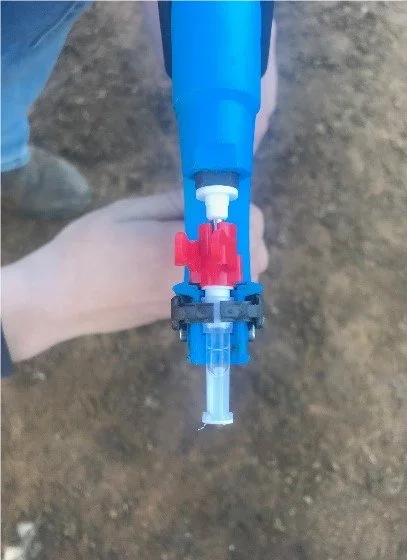
Step 1. To load the TSU applicator, take an assembled TSU (cutter + red spacer piece + sample tube). Squeeze the black retainer clips together and place the TSU in the applicator so the tube fits snugly. Release the retainer clips to lock the TSU in place. Gently squeeze the handle of the applicator to pick up the cutter. The red connection piece can now easily be removed and discarded. The TSU is now loaded and ready to take the sample.
Step 2. Scan the animals eID ear tag, ensuring that it is the correct eID for that animal (being mindful if you are not restraining animals individually you can scan a nearby animal’s ear tag instead), and that the eID appears on the screen of the stick reader and indicator. If there is no eID tag or the tag has been ripped out, manually enter the animal’s VID (visual tag). Data you should capture includes Sex and any comments you think may be relevant for later reference.
Step 3. To take the sample, ensure the animal’s head is still and position the applicator so that the cutter is around 1 to 2 cm from the edge of the ear. Squeeze the applicator in a smooth and quick motion to take the sample. Once the sample has been taken re-squeeze the applicator away from the ear to ensure the red “stopper” is securely in place (as pictured). If the animals are individually restrained, keep them contained until Step 5 is completed.
Step 4. To remove the TSU from the applicator by pressing the black retainer clips to release the tube. To release the cutter gently pull the applicator handles apart and it will pop out.
Step 5. Scan the barcode on the end of the TSU tube with the 2D barcode scanner. Ensure that the TSU number appears on the screen of your indicator or software.
Step 6. Place the TSU in the tray provided by Allflex, starting at A1. If different tests are required for different animals e.g., 50k Genomic or DNA Parentage test place the samples in separate trays. You can then load the applicator with a new TSU and repeat the process for the next animal.
Step 7. The TSU’s are single use so the cutters and red connecting piece cannot be reused. Dispose of these safely as the cutters are sharp.
Step 8. Ensure that you use the TSUs in order that they are presented. This is important in case the TSU number is not fully recorded, the order preference allows you the opportunity to update any data issues prior to sending off your TSUs. If in doubt of an animal identification and TSU match/pairing disregard the TSU and resample the animal. Getting out of sequence can be very costly. Take your time to do the job properly.


